Mfr Part # 4062
ADAFRUIT FEATHER NRF52840 EXPRES
Adafruit Industries LLC
License: See Original Project 3D Printing Wearables
Courtesy of Adafruit
Guide by Liz Clark
Overview
A keyboard and a mouse are great tools for navigating your computer, but they require you to stay near your computer. In this project, you can build a wireless BLE controller with common shortcuts programmed for controlling your streaming apps and yes it can even play Doom!
The rotary encoder/scroll wheel controller is housed in a 3D printed case. The case has holes at the top so that it can be used as a pendant. This way, you won't lose it, you can access it quickly and you can show off your fashion sense by showcasing the aesthetically pleasing ANO Directional Navigation and Scroll Wheel Rotary Encoder.
The brain of the project is a Feather nRF52840 running CircuitPython. This board has BLE so you can connect to your computer wirelessly.
The control interface is an ANO Directional Navigation and Scroll Wheel Rotary Encoder. This lets you have a lot of interface options in a small and ergonomic footprint.
There are two switches in the circuit. The switch on the bottom is an on/off switch. The switch on the side is a mode switch to select between streaming mode or Doom mode. Each mode has different keyboard shortcuts that are assigned to the rotary encoder's buttons and scroll wheel.
Prerequisite Guides
Introducing the Adafruit nRF52840 Feather
ANO Directional Navigation and Scroll Wheel Rotary Encoder and Breakout
BLE HID Keyboard Buttons with CircuitPython
Parts
Breadboard-friendly SPDT Slide Switch
Header Kit for Feather - 12-pin and 16-pin Female Header Set
1 x Black Nylon Machine Screw and Stand-off Set – M2.5 Thread
3 x Silicone Cover Stranded-Core Wire - 30AWG in Various Colors
Circuit Diagram
Wiring
ANO Directional Navigation and Scroll Wheel Rotary Encoder
ENCA to board SDA
ENCB to board SCL
COMA to board pin 5
SW1 to board pin 6
SW2 to board pin 9
SW3 to board pin 10
SW4 to board pin 11
SW5 to board pin 12
COMB to board pin 13
Mode Slide Switch
Switch pin 1 to board GND
Switch pin 2 to board pin A1
Power Slide Switch
Switch pin 1 to board GND
Switch pin 2 to board EN
The rotary encoder has the perfect number of pins to slot into socket headers on the Feather nRF52840. The two slide switches are each soldered to the Feather nRF52840 with two pieces of wire.
3D Printing
The controller may be housed in a 3D printed case, described below. The case consists of three parts: a mounting bracket, a top lid, and a main body. All parts print with no supports.
The STL files can be downloaded directly here or from Thingiverse.
The rotary encoder's breakout PCB and Feather nRF52840 attach to the mounting bracket. The mounting bracket attaches to the mounting holes in the case's lid.
The lid snap fits onto the main body of the case.
The main body of the case has cutouts for the two switches. There is enough room to fit a LiPo battery. Additionally, it has holes to run a chain or string through it to wear it as a pendant.
CircuitPython for Feather nRF52840
CircuitPython is a derivative of MicroPython designed to simplify experimentation and education on low-cost microcontrollers. It makes it easier than ever to get prototyping by requiring no upfront desktop software downloads. Simply copy and edit files on the CIRCUITPY drive to iterate.
The following instructions will show you how to install CircuitPython. If you've already installed CircuitPython but are looking to update it or reinstall it, the same steps work for that as well!
Set up CircuitPython Quick Start!
Follow this quick step-by-step for super-fast Python power 😊
Download the latest version of CircuitPython for this board via CircuitPython.org
Click the link above to download the latest UF2 file.
Download and save it to your desktop (or wherever is handy).
Plug your Feather nRF52840 into your computer using a known-good USB cable.
A lot of people end up using charge-only USB cables and it is very frustrating! So, make sure you have a USB cable you know is good for data sync.
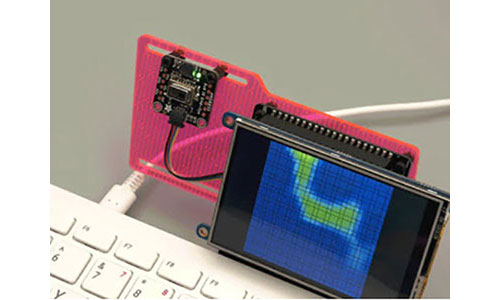
Double-click the Reset button next to the USB connector on your board, and you will see the NeoPixel RGB LED turn green (identified by the arrow in the image). If it turns red, check the USB cable, try another USB port, etc. Note: The little red LED next to the USB connector will pulse red. That's ok!
If double-clicking doesn't work the first time, try again. Sometimes it can take a few tries to get the rhythm right!
You will see a new disk drive appear called FTHR840BOOT.
Drag the adafruit_circuitpython_etc.uf2 file to FTHR840BOOT.
The LED will flash. Then, the FTHR840BOOT drive will disappear, and a new disk drive called CIRCUITPY will appear.
That's it, you're done! :)
Coding the Wireless BLE Encoder Remote
Once you've finished setting up your Feather nRF52840 with CircuitPython, you can access the code and necessary libraries by downloading the Project Bundle.
To do this, click on the Download Project Bundle button in the window below. It will download as a zipped folder.
# SPDX-FileCopyrightText: 2022 Liz Clark for Adafruit Industries
#
# SPDX-License-Identifier: MIT

import board
from digitalio import DigitalInOut, Direction, Pull
import rotaryio
from adafruit_debouncer import Button
from adafruit_hid.keyboard import Keyboard
from adafruit_hid.keycode import Keycode
import adafruit_ble
from adafruit_ble.advertising import Advertisement
from adafruit_ble.advertising.standard import ProvideServicesAdvertisement
from adafruit_ble.services.standard.hid import HIDService

#  pin assignments for the rotary encoder
ENCA = board.SDA
ENCB = board.SCL
COMA = board.D5
CENTER = board.D6
RIGHT = board.D9
UP = board.D10
LEFT = board.D11
DOWN = board.D12
COMB = board.D13

#  mode slide switch pin
SWITCH = board.A1

# Rotary encoder setup
encoder = rotaryio.IncrementalEncoder(ENCA, ENCB)
last_position = 0

# setting the COMA and COMB pins to LOW aka GND
com_a = DigitalInOut(COMA)
com_a.switch_to_output()
com_a = False
com_b = DigitalInOut(COMB)
com_b.switch_to_output()
com_b = False

#  mode switch setup
SWITCH = DigitalInOut(board.A1)
SWITCH.direction = Direction.INPUT
SWITCH.pull = Pull.UP

#  encoder button pins
enc_buttons = (
    CENTER,
    UP,
    LEFT,
    DOWN,
    RIGHT,
)

#  array for the encoder buttons
inputs = []

#  setting the encoder buttons as inputs
for enc in enc_buttons:
    enc_button = DigitalInOut(enc)
    enc_button.pull = Pull.UP
	#  adding to the inputs array with the Button Class of the Debouncer lib
    inputs.append(Button(enc_button))

#  streaming mode keycodes
CHILL_CODES = (
    Keycode.SPACE,
    Keycode.F,
    Keycode.LEFT_ARROW,
    Keycode.M,
    Keycode.RIGHT_ARROW,
)

#  doom mode keycodes
DOOM_CODES = (
    Keycode.CONTROL,
    Keycode.UP_ARROW,
    Keycode.LEFT_ARROW,
    Keycode.DOWN_ARROW,
    Keycode.RIGHT_ARROW,
)

#  streaming state
chill = True
#  doom state
doom = False

#  BLE HID setup
hid = HIDService()

advertisement = ProvideServicesAdvertisement(hid)
advertisement.appearance = 961
scan_response = Advertisement()
scan_response.complete_name = "CircuitPython HID"

#  BLE instance
ble = adafruit_ble.BLERadio()

#  keyboard HID setup
kbd = Keyboard(hid.devices)

#  BLE advertisement
if not ble.connected:
    print("advertising")
    ble.start_advertising(advertisement, scan_response)
else:
    print("connected")
    print(ble.connections)

while True:
	#  check for BLE connection
    while not ble.connected:
        pass
	#  while BLE connected
    while ble.connected:
		#  mode switch
		#  selects whether to be in streaming mode or doom mode
		#  affects the keycodes assigned to the encoder's inputs
        if not SWITCH.value:
            chill = False
            doom = True
        if SWITCH.value:
            chill = True
            doom = False

		#  rotary encoder position tracking
        position = encoder.position
		#  if the encoder is turned to the right
        if position > last_position:
			#  if in streaming mode
            if chill:
				#  send UP arrow for volume
                kbd.send(Keycode.UP_ARROW)
			#  if in doom mode
            if doom:
				#  send period for right strafe
                kbd.send(Keycode.PERIOD)
			#  reset encoder position
            last_position = position
		#  if the encoder is turned to the left
        if position < last_position:
            #  if in streaming mode
            if chill:
				#  send DOWN arrow for volume
                kbd.send(Keycode.DOWN_ARROW)
			#  if in doom mode
            if doom:
				#  send comma for left strafe
                kbd.send(Keycode.COMMA)
			#  reset encoder position
            last_position = position

		#  for loop for keycodes
        for i in range(5):
			#  update state of the buttons
            inputs[i].update()
			#  if you press the center button for a long press
            if inputs[0].long_press:
				#  sends space key
				#  used in Doom for use/open
                kbd.send(Keycode.SPACE)
			#  if a press is detected...
            if inputs[i].pressed:
				#  if in streaming mode
                if chill:
					#  send the streaming keycodes
                    kbd.press(CHILL_CODES[i])
				#  if in doom mode
                if doom:
					#  send the doom keycodes
                    kbd.press(DOOM_CODES[i])
			#  if a button is released...
            if inputs[i].released:
				#  if in streaming mode
                if chill:
					#  release the streaming keycodes
                    kbd.release(CHILL_CODES[i])
				#  if in doom mode
                if doom:
					#  release the doom keycodes
                    kbd.release(DOOM_CODES[i])

	#  if BLE disconnects, begin advertising again
ble.start_advertising(advertisement)Upload the Code and Libraries to the Feather nRF52840
After downloading the Project Bundle, plug your Feather nRF52840 into the computer's USB port with a known good USB data power cable. You should see a new flash drive appear in the computer's File Explorer or Finder (depending on your operating system) called CIRCUITPY. Unzip the folder and copy the following items to the Feather nRF52840's CIRCUITPY drive.
lib folder
code.py
Your Feather nRF52840 CIRCUITPY drive should look like this after copying the lib folder and the code.py file.
How the CircuitPython Code Works
The rotary encoder's five buttons are setup as inputs using the Button class of the adafruit_debouncer library. The adafruit_debouncer library is being used so that the long_press property can be used in the loop.
#  encoder button pins
enc_buttons = (
    CENTER,
    UP,
    LEFT,
    DOWN,
    RIGHT,
)

#  array for the encoder buttons
inputs = []

#  setting the encoder buttons as inputs
for enc in enc_buttons:
    enc_button = DigitalInOut(enc)
    enc_button.pull = Pull.UP
	#  adding to the inputs array with the Button Class of the Debouncer lib
inputs.append(Button(enc_button))Keycodes
There are two sets of keycodes depending on the mode of the remote. The keycodes in CHILL_CODES are for streaming media, such as Netflix or YouTube. The keycodes in DOOM_CODES are for playing classic Doom. The keycode indexes align with the encoder buttons array's indexes. For example, the CENTER button will send the SPACE or CONTROL keycode, depending on the mode.
#  streaming mode keycodes
CHILL_CODES = (
    Keycode.SPACE,
    Keycode.F,
    Keycode.LEFT_ARROW,
    Keycode.M,
    Keycode.RIGHT_ARROW,
)

#  doom mode keycodes
DOOM_CODES = (
    Keycode.CONTROL,
    Keycode.UP_ARROW,
    Keycode.LEFT_ARROW,
    Keycode.DOWN_ARROW,
    Keycode.RIGHT_ARROW,
)
The Loop
Once a BLE connection has been established, the loop checks the value of SWITCH to determine the mode of the controller.
while ble.connected:
		#  mode switch
		#  selects whether to be in streaming mode or doom mode
		#  affects the keycodes assigned to the encoder's inputs
        if not SWITCH.value:
            chill = False
            doom = True
        if SWITCH.value:
            chill = True
            doom = False
Encoder Position
The encoder also sends a keycode depending on the mode. The loop checks to see if the encoder is turning to the left or right. Depending on the direction, a keycode will be sent.
In streaming mode, the encoder controls volume. In Doom, it controls left and right strafe.
#  rotary encoder position tracking
        position = encoder.position
		#  if the encoder is turned to the right
        if position > last_position:
			#  if in streaming mode
            if chill:
				#  send UP arrow for volume
                kbd.send(Keycode.UP_ARROW)
			#  if in doom mode
            if doom:
				#  send period for right strafe
                kbd.send(Keycode.PERIOD)
			#  reset encoder position
            last_position = position
		#  if the encoder is turned to the left
        if position < last_position:
            #  if in streaming mode
            if chill:
				#  send DOWN arrow for volume
                kbd.send(Keycode.DOWN_ARROW)
			#  if in doom mode
            if doom:
				#  send comma for left strafe
                kbd.send(Keycode.COMMA)
			#  reset encoder position
            last_position = position
Sending Keycodes
The adafruit_debouncer library checks the status of the button inputs using update(). A for statement is used to iterate through all five buttons. If the center button receives a long_press, then the SPACE keycode is sent. This is used in Doom for the use/open control.
Otherwise, the for statement checks to see if a button has been pressed or released. If a button is pressed, then the corresponding keycode is pressed depending on the mode. If a button is released, then the corresponding keycode is released depending on the mode.
#  for loop for keycodes
        for i in range(5):
			#  update state of the buttons
            inputs[i].update()
			#  if you press the center button for a long press
            if inputs[0].long_press:
				#  sends space key
				#  used in Doom for use/open
                kbd.send(Keycode.SPACE)
			#  if a press is detected...
            if inputs[i].pressed:
				#  if in streaming mode
                if chill:
					#  send the streaming keycodes
                    kbd.press(CHILL_CODES[i])
				#  if in doom mode
                if doom:
					#  send the doom keycodes
                    kbd.press(DOOM_CODES[i])
			#  if a button is released...
            if inputs[i].released:
				#  if in streaming mode
                if chill:
					#  release the streaming keycodes
                    kbd.release(CHILL_CODES[i])
				#  if in doom mode
                if doom:
					#  release the doom keycodes
                    kbd.release(DOOM_CODES[i])
Wiring
Rotary Encoder and Breakout Board
Soldering the rotary encoder to the breakout PCB. Then, solder nine pin headers to the breakout PCB's pins.
Feather Socket Headers
Trim a row of socket headers to nine sockets. These will be used to plug the rotary encoder into the Feather nRF52840.
Solder the trimmed socket header to the Feather nRF52840, beginning with pin 13. Pins Bat, EN, and USB should remain unsoldered. After soldering, the rotary encoder's breakout can plug directly into the Feather.
Wire Connections
Cut and strip four pieces of wire. Use three different colors to differentiate the connections.
Two pieces in color 1 (black): GND connections
One in piece in color 2 (blue): pin A1
One piece in color 3 (yellow): pin EN
Twist two pieces of wire together for the GND connection. Solder the wires into the GND pin on the Feather nRF52840.
Solder the blue wire to pin A1. This will be the input for the mode switch.
Solder the yellow wire to pin EN. This will be the on/off switch connection.
Tin the ends of each piece of wire with solder.
Cut four pieces of heat shrink. Place one piece onto each wire.
Switches
Solder a GND wire to pin 1 on the on/off switch. Solder the yellow wire to the center pin on the on/off switch. The on/off switch should be connected to pin EN.
Solder a GND wire to pin 1 on the mode switch. Solder the blue wire to the center pin on the mode switch. The mode switch should be connected to pin A1.
Apply the heat shrink to the switches' pins to prevent any shorts.
That completes the soldering for this project!
Assembly
Mounting Bracket
Attach three M2.5 stand-offs with M2.5 nuts in three of the Feather nRF52840's mounting holes. The mounting hole at the back of the board next to the headers should remain empty.
Attach the Feather nRF52840 to the mounting bracket using three M2.5 screws.
Plug the rotary encoder into the Feather nRF52840's headers. The rotary encoder breakout board's mounting holes should line-up with the mounting bracket's mounting holes.
Case Lid
Attach the case's lid to the mounting bracket with four M2.5 screws. The screws will go through the mounting holes on the lid, rotary encoder breakout board and the mounting bracket.
Secure the lid to the mounting bracket with four M2.5 nuts.
Case Body
Plug a LiPo battery into the Feather nRF52840.
Insert the mode switch into the cut-out on the side of the case.
Insert the on/off switch into the cut-out on the bottom of the case.
Close the case with the lid and you're ready to use your new BLE remote!
Usage
After powering up the remote and connecting it to your computer via BLE, open your favorite streaming app (Netflix, YouTube, etc.). You'll be able to control the following parameters:
Full screen: Up Button
Skip ahead: Right Button
Rewind: Left Button
Mute audio: Down Button
Increase volume: Scroll forward
Decrease volume: Scroll backward
Play/pause: Center button
To switch to Doom mode, flip the switch on the side of the controller. You can access classic Doom on the Internet Archive.
In Doom mode, you'll be able to control the following parameters:
Move forward: Up button
Move right: Right button
Move left: Left button
Move backward: Down button
Strafe right: Scroll forward
Strafe left: Scroll background
Fire: Center button (short press)
Use/open: Center button (long press)
Going Further
You can switch modes as often as you like. You could also change the keyboard shortcuts in the CircuitPython code for other apps or games.
If you'd like to test the keyboard inputs, you can use this keyboard event viewer in your browser.