Mfr Part # 5400
ESP32 FEATHER V2 STEMMA QT
Adafruit Industries LLC
License: See Original Project LED Strips Wifi Wireless Adafruit Feather
Guide by Erin St Blaine
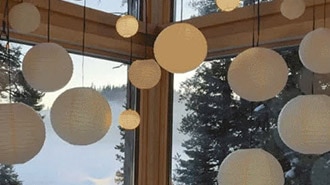
Transform your holiday decor with this fun and easy DIY project. In this guide, you’ll learn how to create a stunning wreath and garland using pebble pixel LEDs, all controllable over WiFi with WLED. Whether you want warm, cozy tones or dazzling animated patterns, these custom lights will bring your holiday decorations to life. Perfect for tech enthusiasts and DIYers alike, this project combines creativity with cutting-edge technology for a truly magical holiday display.
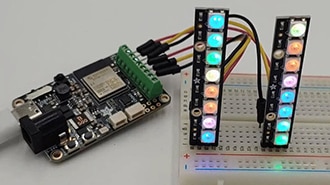
We're using the Adafruit Feather ESP32 to drive a strand of pebble pixels. These pixels are sturdy, flexible, versatile and inexpensive. Add hundreds of lights to your display for just a few dollars. It's easy to sync multiple projects together or segment your strand into parts. The free, open-source WLED software makes it easy to create custom animations and color combos with no coding.
Adafruit NeoPixel Pebble / Seed LED Strand - 200 LEDs - 2" Pitch
Female DC Power adapter - 2.1mm jack to screw terminal block
The NeoPixel strand's data in pin is connected to pin 13 on the Feather.
Connect BAT and +5v to the + side of the screw terminal. Connect G on the Feather and on the LED strand to - on the screw terminal.
The LED seed pixels we're using can be tricky to wire up. They aren't generally marked, though if you look closely you can sometimes see a copper wire spooled around the +5v wire. Data is usually (but not always) in the middle, and it's difficult to tell which is the IN end and which is OUT. So, don't assume this diagram is correct for your pixel strand. We'll go through testing on the Assembly page.
WLED runs on several different boards in Adafruit's collection. There are different benefits to each, but the installation process is largely the same. This page contains instructions for multiple boards -- be sure to use the pinouts and installation instructions for the one you're using.
This is our flagship ESP32 board, designed with WLED and Xlights in mind. It has 4 outputs and is set up to drive either 5v, 12v or 24v pixels. It's a workhorse of a board and for larger projects it's the clear winner. It has an onboard microphone for instant sound-reactive support, and an IR sensor built in, to make it easy to control your project with an infrared remote. It also has a couple stemma ports so you can add your own sensors or peripherals.
The Sparkle Motion Mini is a smaller version of the Sparkle Motion board. It has two LED outputs, a microphone, and two stemma ports that make it easy to add an IR sensor or other peripherals. It's got an onboard NeoPixel and a small footprint, making it perfect for wearables or smaller projects. It will power a whole lot of pixels through the onboard USB port: it's safe to draw up to 4A through this port, giving you plenty of power for most wearable projects.
For Sparkle Motion Mini use at least the 0.15.1 release of WLED.
The QT Py Pico is small and affordable, so usually my go-to for smaller costumes or wearables. It also has a range of BFF add-on boards that add functionality. Here's a guide with more QT Py info. The QT Py will drive up to around 30 pixels through the onboard USB port, so if you have more LEDs than that you may want to consider the Sparkle Motion Mini instead, or you can power the board through the +5v pin.
Note: WLED works on the QT Py Pico but NOT on the S2 or S3 versions, at the time of writing.
The Feather Huzzah ESP32 the top of the line. It's a great choice for projects where you want to add sensors, interaction, or drive a whole lot of LEDs. It's the most reliable as well -- I've run these for two months straight with no power cycling and they just keep on truckin. Adafruit has a very wide selection of Feather Wing boards that connect to the Feather microcontroller line. The sky is the limit with these boards.
It also comes in a version with a high-powered WiFi range extender! If you're trying to sync multiple instances across distance, check this one out. Feather Huzzah ESP32 V2 w.FL Antenna.
The Feather Huzzah ESP8266 will run WLED as well but won't drive as many pixels: the ESP32 limit on WLED is around 1000 pixels per input, but the ESP8266 tops out at around 500. It's about $5 cheaper though, so for smaller projects it's a great way to save a little money and still have access to all the FeatherWing options in the Adafruit store.
Some versions of our controllers have a new serial chip which needs a driver installed before we can install WLED. Head over to our How to Install Drivers for WCH USB to Serial Chips tutorial and download and install the new driver.
If you have an older QT Py with CP2102 USB-to-Serial bridge, use SiLabs’ driver instead.
These next steps require a Web Serial-compatible browser. As of this writing, that means Google Chrome, Microsoft Edge or Opera “desktop” browsers. Other browsers (Safari, Firefox, Explorer and anything mobile) won’t work.
Visit https://install.wled.me/
Plug your microcontroller into your computer with a known good USB cable. Click "Install" and select the port for your board.
Depending on the USB-to-serial bridge chip on the board, you might see one or two serial ports. On Mac, for instance, there might be both “/dev/cu.usbmodem[number]” and “/dev/cu.wchusbserial[number]”. Use the “wchusbserial” one.
After successful installation, enter your WiFi network name and password when prompted. This must be a 2.4 GHz WiFi network; ESP32 does not support 5 GHz networks. If it can’t connect, then as a fallback WLED will create its own 2.4 GHz WiFi access point.
Sometimes the "Connect to Wi-Fi" prompt doesn't show up. Don't panic, just see the step below on connecting your computer or mobile device to the WLED-AP access point created on the microcontroller itself!
If you don't see the "Connect to Wi-Fi" prompt, you'll need to set up your WiFi network using AP (access point) mode. Open up your WiFi settings and look for a WiFi network called WLED-AP. (Note, this access point can take up to 30 seconds to appear sometimes.) Connect to this network using the default password wled1234. The WLED interface will pop up in its own captive browser window.
From here, go into Config/Wifi Settings and enter your WiFi credentials for the access point you normally use near the top.
Give your project a name in the mDNS field a little further down the page. Now you can type in "projectname.local" (where "projectname" is your mDNS name) into any web browser on the same wifi network to access your microcontroller.
You can also scan the QR code below to open access point mode.
For more help and troubleshooting tips visit the Getting Started page on the WLED knowledge base.
Head to the WiFi Setup screen under Config and create a good URL so you can control your project from any web-enabled device. Call it something you'll remember, that's easy to type into any web browser on your WiFi network in order to connect to your project.
In Safari or Chrome on your phone or computer, type in this web address to access the WLED interface: http://projectname.local (where "projectname" is whatever you put into this field).
Check out the Additional Settings page for more info on accessing your project. WLED has an "access point mode" that doesn't require a WiFi network for when you're out on the go. It's also helpful to download one of the WLED apps to help manage and organize your projects.
Next, head to the LED Preferences tab under the Config menu.
Scroll down to Hardware Setup. Put your total number of LEDs into the "Length" field and change GPIO to the pin number associated with the pin you soldered to. Check the pinout diagram for the board you're using (it's the number in yellow).
Feather Huzzah ESP8266 Pinout
Now you can use any computer or handheld device to control your LEDs.
Make sure your device is on the same WiFi network as your board. Navigate to your custom URL (projectname.local/ ) in a web browser. You'll see a color picker above a whole bunch of color palette choices.
Choose a color, choose an effect, and watch your lights animate and glow!
Save your favorite combinations as presets, create playlists, control the speed and intensity of the animations, and lots more. This web app is incredibly intuitive and easy to use.
Head over to the WLED wiki at https://kno.wled.ge/ to delve into all the particulars.
First, we need to identify the wires on the pebble pixel strand. One wire is 5V power, one is ground, and the third is the data wire, which is directional -- connect at the IN end and data flows through to the OUT end.
Figuring out which wire is which is the hardest part of this project. These wires are generally not marked, and there's no standard for which connector is which. There are a couple tricks that will help us.
If your strand has connectors soldered to it, you can usually (not always) trust the color coding. Red is almost always +5v, black is usually G, and a green or other colorful wire is usually data.
The +5v wire often has a tiny copper wire coiled around the inner wire inside the shielding. If you spot this, or anything that looks like stripes, you know you've found the power wire, usually connected to red.
With the resin bump facing you and the connector pointing upwards, place the +5v wire on the left. We can make an educated guess that this is the IN end, the middle wire is data, and the rightmost wire is G. Let's start with this assumption. If the wires don't light up, try the same configuration at the other end.
If you have some alligator clips and a Circuit Playground Express or other microcontroller with copper pads, you can load up some NeoPixel test code and clip the wires to the controller to be sure you've got it right. If not, then just soldier on and be prepared to redo it if you need to.
If your strand already has connectors soldered to it, use those. Otherwise, solder a male 3-pin JST connector to the IN end of your strand.
Mine has a male connector on the IN end.
Grab your extra JST connectors and plug the corresponding (female) connector into your LED strip. Adafruit's JST connectors are all black, so the easiest way to keep the wires straight is to solder while plugged in to the strand (but not plugged into power!).
Solder the 3 wires of the female connector to your Feather ESP32 as shown:
+5v/Red Wire to BAT
Middle wire to GPIO 13
Black / G wire to G
Check to be sure the wires are going to the right place -- switching the power and ground wires will cause your board to short out.
If your project has just a few pixels (no more than 30-50), you can now power them up through the JST connector port. You can also power from the USB port -- but if you're doing that, connect the power wire to USB instead of BAT.
If you have more than 50 pixels you can damage your microcontroller if you try to pull the power through the board like this. Here's a better way to power longer strands.
Grab your second male/female pair of JST connectors. Strip about 1/4" of shielding off all 6 wire ends. Solder the middle wires together.
Plug the female connector into the male connector you just soldered onto your Feather. Plug the female into the LED strip. Follow the wires carefully and twist together the two power and two ground wires on the connectors.
Unscrew the tiny screws on your screw terminal and slide the twisted pairs of wire into the correct holes: power to + and ground to -.
Check and double check that you've got this right. The ground wire should go from the Feather G pin to the screw terminal -, then out to the G wire on the pixels. The pixel wire with the copper coil should go from +5v to + to BAT.
Plug your power supply in via the screw terminal and your lights should come on. Success! If they didn't, here are some things to try.
Have you loaded the WLED software yet? Do that first.
If you can't get the lights to light up at all, you may be connecting to the OUT end instead of the IN end. Try flipping the strip around.
Double check that you've set up the correct GPIO pin in LED Settings in WLED - the lights won't come on if you've soldered to pin 12 and set up the software on pin 13.
Wiggle the wires in the screw terminal. These things can be fussy, or the pads can be misaligned. Unscrew and re-screw until you can tug on the wires with nothing coming loose.
Once your lights have come on, open a browser and go to your project in WLED. If you gave it a name in the WLED settings, you could get there by typing that into your location bar followed by ".local" -- mine can be reached by going to http://garland.local.
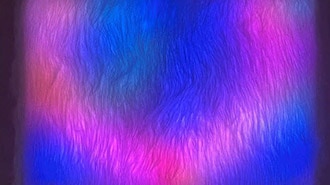
Normally when WLED first boots up, the default is a warm yellow light color. But our lights didn't boot up in yellow... they booted up in green. What gives?
Open the WLED interface (open garland.local in a browser window). Choose "solid" as your effect and red as your color from the color picker.
My lights are now bright blue. If I choose green, they turn blue, but if I choose red or green they appear to be swapped. Not to fear: these pixels simply have a different Color Order than standard. There's a setting in WLED to fix this.
Head to the LED Preferences tab under Config and scroll to the Hardware Setup section. Find the box for Color Order and change it from GRB (green, red, blue) to BGR (blue, green, red). This will swap red and green, so your strip matches the interface.
FYI: This can be a problem when mixing different types of strips or strands. Normally you can solder together any kind of NeoPixels as long as you match the pins and get the data order right, or solder multiple strands or rings on different pins on your QT Py. But if the color order is different on one of the strands, there's no way to tell WLED to treat the different strands differently. Changing this dropdown will affect your whole project, so take that into account when you're doing your planning. You may need an additional controller if you want to add a different type of lights.
I found a few gently used holiday wreaths at my local Goodwill. They were a bargain at $5 each, and I love that I'm keeping all this plastic out of our landfill for at least few more years.
You could also make your own from real branches and fill your home with a lovely pine-fresh scent.
I cut the assembly wires on two of the wreaths and straightened them out. I used some 16g wire to wire them together end-to end. Now they're bendable and poseable. I kept the third wreath intact and connected it to the middle of the garland strands with more wire.
Starting at one end, I wrapped the pixel strand around the garland. I went up one side, then wrapped the wreath, then down the other side.
In hindsight it would have been helpful to find the middle of the strand and mark it before I started, since it's hard to tell how much strand you have to work with while you're wrapping the wire. I have 300 pixels so I can wrap pretty densely.
That's all there is to it!
If you've got extra pixels at the end, you can cut them off and reuse them for another project.
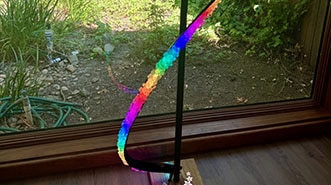
If you've ever wondered how these garlands are made, here's a short video showing the incredibly cool machine that makes them out of plastic ribbon wrapped with wire. Neat!
"Presets" refer to a particular combination of animation, color palette, and speed/intensity/brightness settings. Making the presets is a lot of fun - you get to play around in WLED and find settings that suit your style.
"Playlists" are a scripted list of Presets that will play in a specific order (or shuffle) for a specified amount of time. WLED gives you a lot of control. You can also set your playlist as the default setting when WLED boots up, so you can just turn them on and go.
Play with the effects and colors until you have the lights in a mode you want to save. Click over to the "presets" tab and click "+ Preset". Give it a name and save it to your list.
Once you've saved a few presets, you can string them together into a playlist. The playlist options include the ability to set your duration (how long each preset plays) and the transition time.
Take note of the number assigned to your playlist. In the next step you'll set up WLED to default to this playlist on startup.
Head to Config --> LED Preferences and scroll down until you find the Defaults section. Here you have an option for "Apply preset 0 at boot". Enter the number of your playlist here and click "save". Now when you boot up WLED your playlist will load first automatically.
You can also control the default brightness here. If you're finding your battery life to be too short, turning the brightness down will help.
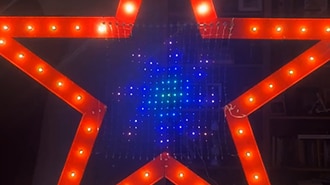
Segments in WLED let you partition your LED strip into multiple sections, each with its own effect, brightness, and color settings. This is particularly useful when you want different parts of your project to display unique animations or remain static while others move.
I want my wreath to stay green while the garland pulses in red and white candy cane stripes. The wreath is right in the middle of my strand, so I need to tell WLED to treat those specific pixels as a different segment. Here's how to make that happen.
Segments interact with your presets in a way that can be a bit confusing. The easiest way to get started is to make sure you have at least one preset saved in your list. Once you're happy with your segment setup, save a new preset (or update an existing one). Then, whenever you load that preset your segment setup will be restored.
The reason for the confusing interface is that segments can be used in all different kinds of configurations on the same board. You can have one preset with three segments and a different preset with five completely different setups. Make a master preset with your favorite settings so you don't get lost.
I made separate segments for the right-side garland, the left side garland, and the wreath. Input the start and stop LED for each segment. Select the check mark on the segment you want to edit, then select your effect and color palette. That selection will ONLY affect the checked segments.
I selected the Right and Left segments and then selected the "Flow" effect and the Red Shift palette.
Then, I unchecked the Right and Left segments and checked the box on Wreath. I made the wreath a solid green.
Once all the segments are behaving the way you want, save the configuration as a preset.
Segment 0 can't be edited; it will affect the entire project.
I made a fireplace effect animation by using the "reverse direction" checkbox on my left side segment. I selected the Fire2012 animation and a fire palette, and with this box checked the "fire" appears to burn up from the bottom of each side.
Find this on the LED Settings screen.
WLED automatically limits the brightness of your project, so your power supply doesn't get over-taxed. The default amperage is 850mA, which is a little low for most power supplies.
For some projects, especially battery-powered projects, having the limiter turned on is a good idea. But if you're not getting the brightness you expect, try adjusting this number to match the amperage of your power supply or battery pack.
While you're home, it's easy to control your project over your local WiFi network. But when you're out at a festival you probably don't have WiFi access. It's still possible to connect to your project and control it using WLED's Access Point Mode.
Turn your project on and give it a minute or two to start broadcasting. Look in your WiFi networks and find WLED-AP - this is a mini WiFi network being broadcast by the microcontroller. Connect to it - the default password is "wled123". An instance of WLED will automatically pop up and you can control your project from anywhere.
If you're putting your lights up in public, it's a good idea to change the AP Mode default password so strangers can't log in and control your lights. This could be a security risk.
AP Mode only broadcasts for a few minutes after you boot up the board so if you don't see the WLED-AP network try rebooting.
There are a couple different apps available to manage your WLED projects. Name and organize your projects and find them quickly without having to type in a URL. Check the Apple or Android store for downloads.
My favorite is "WLED Native". It allows you to organize multiple instances and easily switch between devices without having to remember any URLs.
Under Config / Security & Updates you will find a place to back up your data. It's a good idea to back up your config file as soon as you're happy with the settings. Save it as a .json file on your computer. Now you can prototype and experiment to your heart's content, and if everything breaks, just re-upload this file. Or, if you're doing another build you can use this feature to copy all your settings from one board to another.