Mfr Part # 4333
CIRCUIT PLAYGROUND BLUEFRUIT BLE
Adafruit Industries LLC
License: See Original Project Displays Wearables Circuit Playground
Courtesy of Adafruit
Guide by John Park
Overview
Create your own "mad-eyed" Cybernetic Santa Claus eye patch! The eye code with robot/terminator style eye animation runs on the Adafruit TFT Gizmo and Circuit Playground Bluefruit or Express.
Some simple crafting with EVA foam sheets makes for a stylish, comfortable eye holder.
"Ho-ho-ho. Get to da reindeer!"
Parts
Circuit Playground TFT Gizmo - Bolt-on Display + Audio Amplifier
EVA Foam Pack in Rainbow Colors - 2mm thick - 10 sheets
Adafruit Micro-Lipo Charger for LiPoly Batt with USB Type C Jack
Materials and Tools
In addition to these parts, you'll also need the following:
Scissors or craft knife
CA glue (a.k.a., Superglue)
String or paracord
Santa hat/beard
Assemble the Board
The TFT Gizmo will attach to either the CPB or CPX with enough room for the 350mAh battery to sandwich in between.
Prep the TFT Gizmo following these instructions by removing the twelve little Kapton tape dots on the end of each standoff.
Board Connection
Making sure to orient the Circuit Playground board with the USB jack pointed "north" and with the TFT Gizmo's 12 o'clock marking also pointed "north", place the battery between the boards as shown. You can use a small bit of blue tack or thin double-sided tape to keep the battery from wiggling around.
Also make sure the battery is oriented so the JST cable can plug into the Circuit Playground battery connector.
Screw the 12 M3 screws into the standoffs to connect the boards both electrically and mechanically.
Charging
To charge the LiPoly battery, you'll need to unplug it from the Circuit Playground and into a LiPo charger.
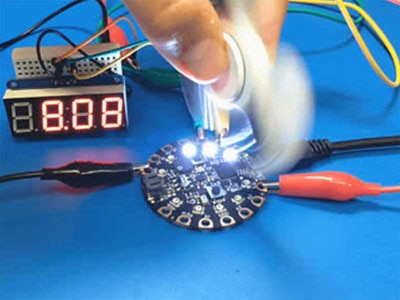
Next, we'll put the code on the board -- for this project we'll use the CPB_Eye_Terminator.UF2 file or CPX_Eye_Terminator.UF2 file seen on the next page.
Ready-Made UF2 Files
Among the appealing features of Adafruit’s ARM boards is the use of the UF2 bootloader, which makes these boards show up as a small USB flash drive on your computer. Just double-tap the reset button and copy a pre-compiled binary file over to this drive…no need to install or compile anything special with the Arduino IDE! We have a few ready-made animated eyes for some of the Adafruit boards that have screens attached…
The hazel Human eye is used by default in our animated eyes code, with an anime-sized iris.
The Dragon eye demonstrates use of a slit pupil.
Some animals have such huge irises you rarely see the sclera (the white part of the eye). No_Sclera is an example eye for these situations.
The Newt eye originated from the Eye of Newt pendant guide…but this one’s trivial to install thanks to the UF2 bootloader.
The Terminator eye design originated with the Terminator Eyeball Upgrade guide…but again, so much easier to install now.
Circuit Playground Bluefruit with TFT Gizmo
These are compiled for the Circuit Playground Bluefruit board with TFT Gizmo and will not work on other boards.
Currently, the pupil reacts to the light sensor…this is a bug, the pupil should have its own movements because the sensor is on the reverse side from the TFT display. These UF2s will be updated once it’s resolved.
This is a highly specific Cybernetic Santa Claus version that includes both our Terminator eye graphics and the code to drive a strand of 30 NeoPixels plugged into the TFT Gizmo's A2 port.
CPB_Eye_Terminator_Santa_Lights.UF2
Circuit Playground Express with TFT Gizmo
Similar to the above, these are compiled specifically for Circuit Playground Express with the TFT Gizmo; they will not work on other boards. The light sensor is not used here, since it’s on the opposite side from the display…instead the pupil dilates on its own. This can all be changed if you compile from the source code.
Other Boards, and Customizing the Look
Ready-made eyes for the Adafruit HalloWing M0 board are available in the HalloWing guide.
For the HalloWing M4 and MONSTER M4SK, see the MONSTER M4SK guide. This one works a bit different…the code and graphics are separate pieces.
For everything else, including customizing the behavior and look of the eyes, you’ll need to compile from source code, explained in the original “Uncanny Eyes” guide.
Make the Cyberpunk Eye Holder
Getting the board up and running with the Terminator eye animation was pretty straightforward -- the trickier part is usually how to mount the thing comfortably from the front of your face!
No worries, EVA foam sheets make this easy and fun to do, with great looking results.
Template
First, print out the linked .pdf template file and cut it out carefully with a craft knife or scissors.
Be sure to print it at a full scale 1:1 ratio -- don't let your printer driver interface scale it to fit!
Foam Cutouts
Now, use the template to transfer the design to the foam sheet with a marker, then cut it out.
Foam Connections
Yes, it's true, we'll need to unscrew the screws we had used during board testing in order to assemble the foam backing. Sorry about that, but it was necessary to make sure everything was working in the hardware/software realm before doing the crafting portion of the project!
Re-assemble the boards with the foam backing covering the Circuit Playground side of the board as shown -- the TFT Gizmo is on the other side, face down on the workbench in this photo, with the 12 o'clock label facing "north".
Top Foam Molding
Just like forming fondant on a cake, we now get to mold the top foam over the Gizmo! The EVA foam is fairly pliable and will conform to a shape when pressed and worked into it.
Center the cutout circle over the TFT display, then work the sides down over the boards.
If you need to get even more forming action you can apply heat from a heat gun or hair drier, but I didn't find this to be necessary in this case.
String Wrap
To better secure the foam top material, as well as to tie/clasp the device to your head later, we'll use about a 6-foot (about 1.8 meter) length of paracord, or string as shown.
Wrap the center of the string under and around the boards, then wind them a few times around each other. Pull them tight and then weave them through the holes as shown.
A few dabs of CA glue can help keep the cord twists together where they overlap, although this is optional since the tension applied by wearing the headband will keep it together.
Finishing Touches
Use a small amount of CA glue to secure the two foam pieces, being sure to leave a space unglued for USB cable to plug in from the top.
You can use some clothespins to clamp the parts while the glue dries.
Optional Clasp
You can simply tie the string around your head when you are ready to wear it, or add some fancy plastic paracord buckles as shown here.
Now, dress it up with your favorite Santa hat and beard!
Add Lights
Want to go one step beyond this already fancy project? Let's add a string of lights! The TFT Gizmo has a couple of JST ports that can drive NeoPixel strands, among other things.
We just so happen to have a custom .UF2 file you can use that will both run the cyborg eye AND drive a strand of 30 NeoPixels with blinking, holiday colors!
This NeoPixel strip is perfect for the job -- it's half a meter long, has 30 NeoPixels and the JST connector plugs right into the TFT Gizmo for power, ground, and data.
Adafruit NeoPixel LED Strip with 3-pin JST PH 2mm Connector
For this to work, swap out the .UF2 file you used for this version, as covered in the Ready-Made UF2 Files page of this guide.
Plug the NeoPixel Strip into the JST plug on the side of the TFT Gizmo that is labeled A2.
The A2 port is on the left side of the TFT Gizmo when looking at the display.
It's simple to cut a small slit in a Santa hat to hide the strip behind the faux fur -- which acts as a great diffuser!